

[ad_1]
Easy methods to zoom in Lightroom is the very last thing we fear about after we begin utilizing this system. We deal with it as a trivial and self-evident course of.
However, for those who consider your Lightroom modifying workflow, you notice it’s an intricate multistep course of interrupted by an infinite variety of zooms out and in.

Additionally, the distinctive modular construction of Lightroom provides one other stage of complexity. Typically, it feels that every Lightroom module is a stand-alone utility with its distinctive instruments, shortcuts, and functionalities.
I consider that for those who discover ways to purposefully use the zoom performance in several areas of Lightroom it can save you time and enhance your modifying by making it extra fluid and fewer interrupted.
On this article, I illustrate how I exploit the zoom performance of Lightroom all through my modifying course of from begin to end.
Belief me, it’s extra difficult and complicated than you suppose.
Easy methods to Zoom In Lightroom: Fundamental Zoom Controls
The simplest approach to zoom in Lightroom is merely by clicking anyplace within the chosen picture in a single picture (loop) view. Doing this causes it to zoom right into a beforehand used (default) zoom magnification stage. Clicking a second time anyplace within the picture zooms out and takes you again to the unique view.
You’ll be able to change the default magnification ranges however this can be a extra superior function that you’ll be taught extra about on this article.
Easy methods to Zoom In Lightroom In Import Module
Few photographers use the zoom performance within the Import Module, together with me.
The concept of evaluating the picture earlier than bringing it into the Lightroom catalog with the choice to discard it if essential is a really compelling proposition.
However, the difficulty is that earlier than a photograph is imported to Lightroom, there’s not a high-quality preview obtainable and the one choice for analysis is to embed a low-resolution JPEG inside a RAW picture.
Associated: Easy methods to Create and Use Import Presets
Often, when I’m again from a day or half-day journey with solely a handful of images, I’d use the Import Module to establish and discard undesirable photographs.
The Method I exploit Zoom in Import Module
My favourite method of zooming out and in within the Import Module is to make use of the shortcuts:
Ctrl +/- on a PC (plus/minus) or Cmd +/- on a Mac (plus/minus)to undergo 8 zoom ranges.
Extra Zoom Choices in Import Module
Finally, you should use the Zoom slider on the proper aspect of the toolbar beneath the picture.

Easy methods to Zoom In Lightroom In Library Module
The first perform of the Library Module of Lightroom in my workflow is to establish the images I’d contemplate for growing and publishing (the keepers). This course of is often known as culling.
My culling course of consists of two levels.
First, I’m going by means of all of the newly imported images one after the other with a single goal—to establish all of the insufficient photographs, those that may by no means be used, and flag them as rejects.
For instance: out of focus or blurry photographs, or unintended photographs of my boots.
Second, I’m going by means of my images once more with the aim of pinpointing the most effective photographs I contemplate for growing and finally publishing. I flag these as keepers.
Lightroom’s zoom performance is a necessary a part of the culling course of since I zoom in on completely different areas of the picture earlier than making my determination as as to whether the chosen picture is a reject or a keeper.
Associated: Easy methods to Undo in Lightroom
I begin culling by hitting the TAB key to cover each the left and proper panels. Since I don’t want any instruments through the culling course of, I prefer to maintain my workspace uncluttered.
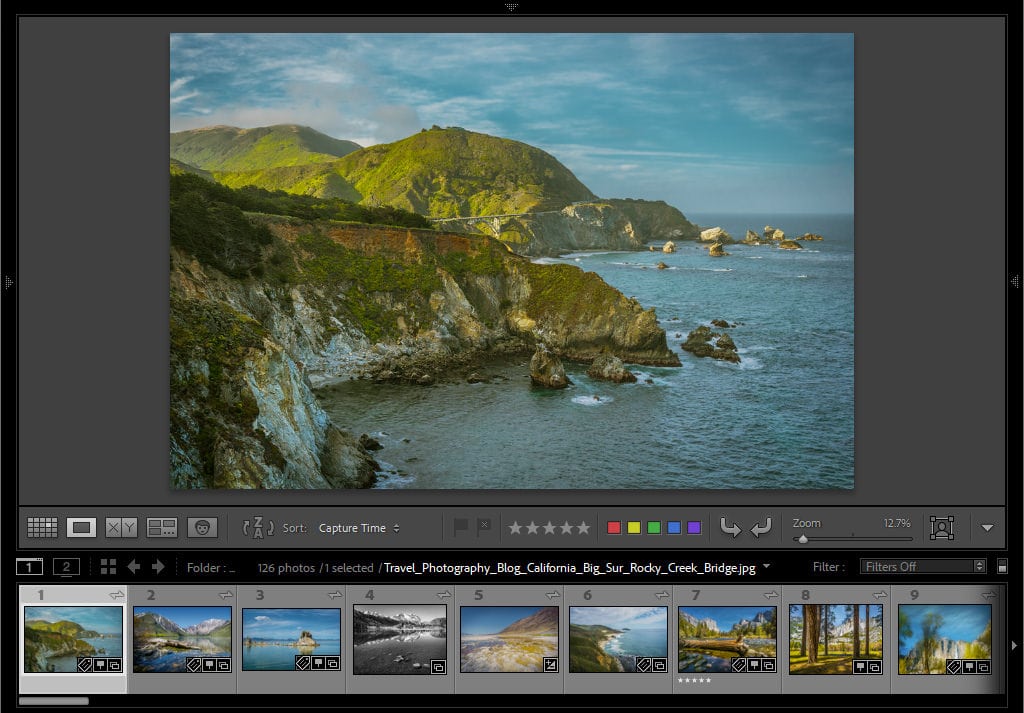
The Method I exploit Zoom in Library Module
I’m going by means of images in a single (Loop) picture view one after the other utilizing the arrow key. When I’m not totally positive if the chosen image is a keeper or not, I hit the “F” keyboard shortcut that tells Lightroom to take over the complete display and show the picture in “full display.” After I hit “F” a second time, it takes me again to the only picture (Loop) view.
At this level in my culling course of, I’m usually able to make my determination. However, if I nonetheless want extra information, I exploit a extra selective analysis.
Associated: Lightroom Group Ideas
I maintain the SPACEBAR down and use the Hand Software to pan across the picture to judge the assorted areas of the picture. The Hand Software solely seems when the spacebar is down.
Typically, I study if I nailed the main focus and if the proper areas of the picture are completely sharp. When I’m completed inspecting, I launch the SPACEBAR and am again the place I began.
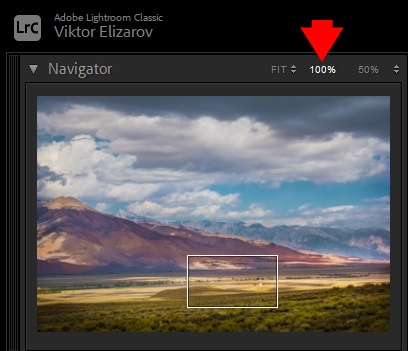
Here’s a small, however essential element. Whenever you hit the SPACEBAR, it goes to the beforehand used zoom stage. When evaluating photos, I need to at all times use 100% magnification and, to make sure 100% is the default worth, I have to click on the 100% icon within the Navigator Panel.
Extra Zoom Choices in Library Module
By hitting the keyboard shortcut “Z” as soon as, it takes you to the beforehand used zoom stage. By hitting “Z” a second time, it brings you again to the unique zoom state.
Use the shortcuts Ctrl +/- on a PC (plus/minus) or Cmd +/- on a Mac to undergo all 12 current magnification ranges.
Field Zoom
Field Zoom is a comparatively new function that was launched in Lightroom 10 in 2020. It means that you can zoom into a selected space. Press down the Management key on Home windows or Command key on Mac and drag the field along with your mouse round a selected space. Field Zoon works in each Library and Develop modules.
Easy methods to Zoom In Lightroom In Develop Module
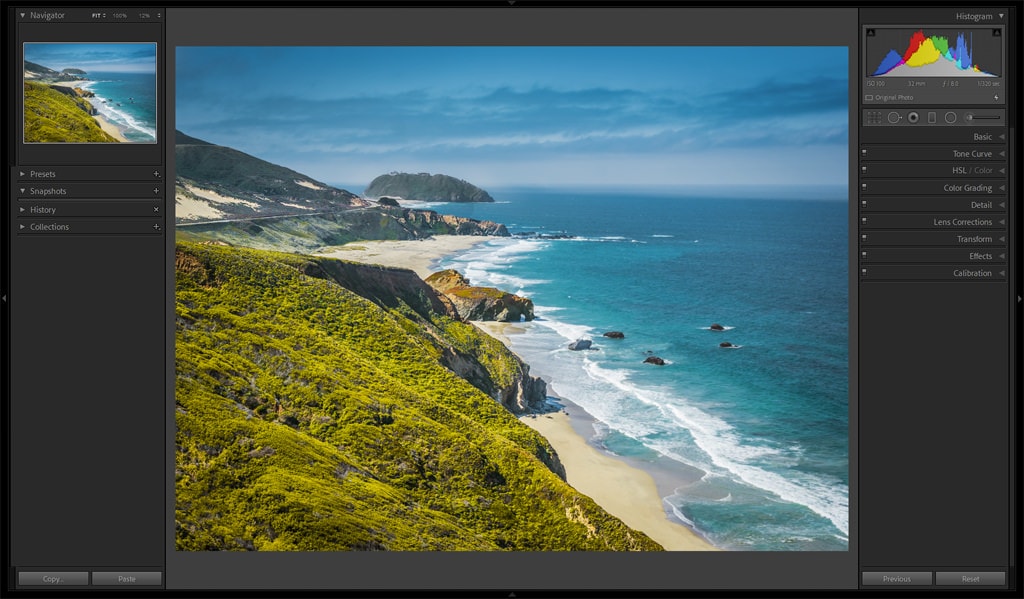
After I change to the Develop Module of Lightroom, because of this I’ve a selected picture that I need to work on. It additionally implies that I not want the navigational menus.
I begin my modifying workflow by hitting the F5 and F6 keys to cover the highest and backside filmstrip panels. I need to maximize my workspace and have direct entry to the presets on the left panel and the modifying sliders on the proper panel.
The Method I Use Zoom in Develop Module
I most frequently use fundamental zoom controls within the Develop Module.
I amplify the particular space I’m planning to edit by clicking on the picture. This takes me to the 100% zoom stage. I exploit the Hand Software to pan round as essential. Relying on the picture, I exploit varied selective modifying instruments just like the Adjustment Brush, Radial Filter, Spot Removing and so forth. When I’m completed, I click on anyplace within the picture to return to the unique dimension.
On uncommon events, after I must zoom past 100%, I exploit the Navigator Panel to pick the magnification stage wanted.
Associated: Easy methods to Use Masking in Lightroom
The second zoom management I exploit within the Develop Module is the “F” shortcut. As soon as once more, this takes the picture into full-screen mode and permits me to raised study my modifying progress.
Field Zoom
Field Zoom is a comparatively new function that was launched in Lightroom 10 in 2020. It means that you can zoom into a selected space. Press down the Management key on Home windows or Command key on Mac and drag the field along with your mouse round a selected space. Field Zoon works in each Library and Develop modules.
Scrubby Zoom
If the Field Zoom function works in each Library and Develop modules, Scrubby Zoom works within the Develop module solely. It’s a new superior function that requires GPU acceleration to be turned on.
Press down the Shift key and by dragging the mouse to the proper or left you’ll be able to enhance or scale back the magnification ranges.
Easy methods to Zoom In Lightroom In Map Module
Since my Fujifilm digicam doesn’t have GPS tagging performance, I exploit the Map Module to manually geotag my images. Earlier than importing the images to SmugMug, I make certain each picture has GPS coordinates embedded into the metadata.
Utilizing Zoom in Map Module
There are two zoom controls I exploit lots which might be distinctive to the Map Module.
First, I exploit the mouse wheel to zoom out and in the identical method the wheel works within the internet model of Google Maps. I really like this function and need it was carried out into each the Library and Develop Modules.
Second, by urgent the Alt (Win) or Possibility (Mac) key down and dragging the oblong space on the map, I can zoom in to a selected space. Priceless.
You can even double-click to zoom in, however to zoom out, you should use the zoom controls or the mouse wheel.
Superior Zoom Controls of the Navigator Menu
The Navigator Panel presents a wide range of controls and choices for zoom performance in Lightroom.
Setting the Lively Zoom Ranges
On the high of the Navigator Panel, you’ll discover 3 icons that characterize the energetic zoom ranges. One of many zoom choices is fixed (100%) and the final is selectable.

I at all times set the selectable choice to 200%. This implies I at all times have 3 choices (Match, 100%, and 200%) obtainable to me with one click on solely
Associated: Adobe Lightroom Workflow Ideas
Optionally, you should use Ctrl +/- on a PC (plus minus) or Cmd Alt +/- on a Mac to undergo all 12 of the predefined zoom ranges.
Match vs Fill Zoom Ranges
The “Match” magnification choice is clear and uncomplicated. Lightroom robotically selects the magnification stage to suit the complete picture contained in the obtainable working space.

The “Fill” choice is extra complicated and fewer obvious. Lightroom selects the magnification stage to suit the shortest aspect of the picture, ensuring the complete working space is crammed.
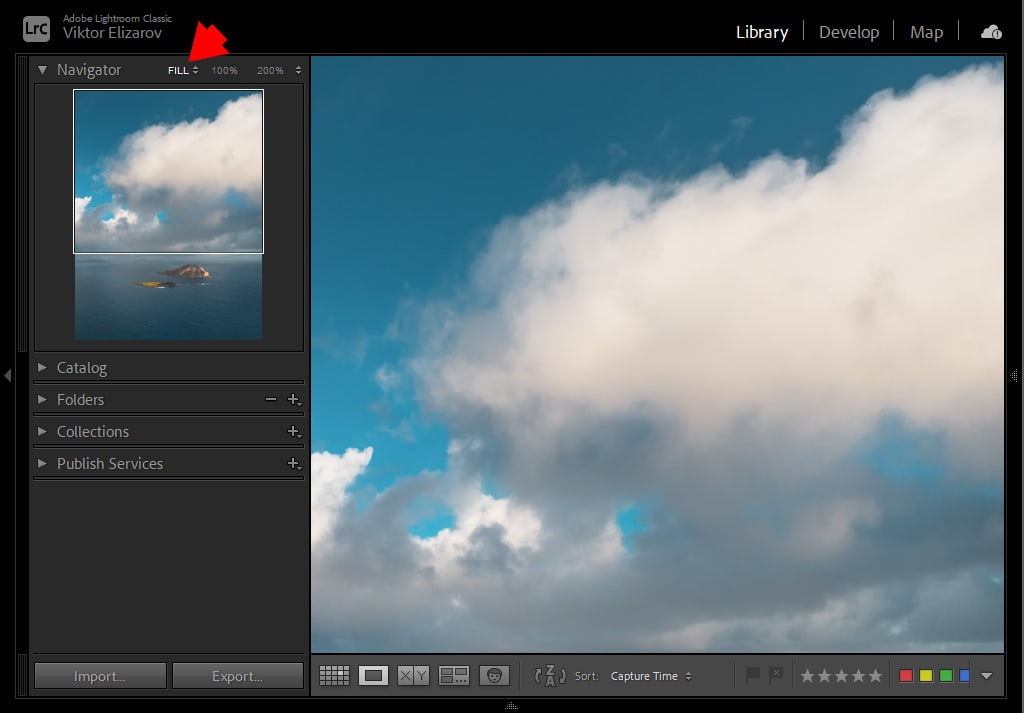
I don’t discover the “Fill” choice to be very helpful for my workflow and need there was an choice to cover it.
Exploring the Picture Utilizing Navigation Panel
Whenever you edit a excessive pixel depend picture and use the 100% zoom magnification, it’s straightforward to get misplaced and never know what a part of the picture you’re exploring.
That is when the Navigator Panel might help. After zooming in, you’ll be able to drag the white rectangle contained in the Navigator Panel to maneuver across the picture.
Superior Analysis in Navigation Panel
After I work on a portfolio piece, I need to be sure that each space and pixel of my ultimate picture is processed appropriately—that I eliminated all of the artifacts attributable to sensor mud and didn’t miss any noisy spots throughout noise discount. The method will be time-consuming when coping with high-resolution photos.
That is after I use one in all my favourite options within the Navigator Panel.
I click on the 100% zoom choice. I hit the “Residence” key, which tells Lightroom to put the white rectangle within the high left nook of the Navigator Panel.
Subsequent, I begin hitting the “Web page Down” key and Lightroom methodically goes from one space to a different with out lacking even one pixel of the picture till it reaches the underside proper nook. This helps me assess the complete picture in a really quick time.
Easy methods to Zoom In Lightroom | Conclusion
Zooming in Lightroom is an easy course of that may be achieved in several modules of this system. By following the information outlined on this article, you’ll be able to see your images in larger element and make granular changes.
Articles Associated to “Easy methods to Zoom In Lightroom With Goal and Fashion“
[ad_2]