

[ad_1]
If you’re searching for a fast resolution for learn how to straighten a photograph in Lightroom you come to the proper place. This text will educate you learn how to use my tried and examined 3 step method to straightening any photograph.

It’s uncommon after we take {a photograph} and the geometry of the shot doesn’t require any corrections or tweaking. Actually, it’s nearly a certainty that, with most pictures, we must appropriate varied varieties of distortions and imperfections.
The great factor is that Lightroom offers us greater than sufficient instruments to take care of these points.
To straighten a photograph in Lightroom, use the next 3 step method:
within the Develop module of Lightroom, choose the photograph you need to straighten.
- Step 1 – Repair lens distortion by finding the Lens Correction panel and checking the Allow Profile Correction choice.
- Step 2 – Repair the uneven horizon by opening the Crop Overlay software on the proper facet, and clicking the AUTO button. Lightroom will straighten the horizon robotically.
- Step 3 – Use the Upright instruments within the Rework panel to repair horizontal and vertical perspective distortions.
And now, I need to handle, in additional element, three predominant varieties of geometric imperfections that we face most frequently in our images and the way I method them in my modifying workflow.
The best way to Straighten a Photograph in Lightroom in 3 Steps
Step 1. Repair Lens Distortion (Barrel Distortion)
The principle attribute of lens distortion is when the straight traces in the true world seem like bent or curved within the captured {photograph}. Lens distortion is a direct results of the lens design and, consequently, varies from lens to lens.
There are two widespread varieties of lens distortion: Barrel Distortion and Pinch Distortion.

Barrel Distortion is when straight traces are bent outward from the middle.

Pinch Distortion is when straight traces are bent inward towards the middle.
Pinch Distortion is produced by telephoto lenses and Barrel Distortion is produced by wide-angle lenses.
Extensive-angle lenses have a tendency to supply a a lot stronger lens distortion and, consequently, barrel distortion is the commonest kind of distortion we face when capturing panorama and architectural images.
Associated: The best way to Merge A number of Catalogs in Lightroom
The excellent news is that fixing barrel distortion is a simple, one-step course of.
Fixing Lens Distortion With Lens Correction Instruments
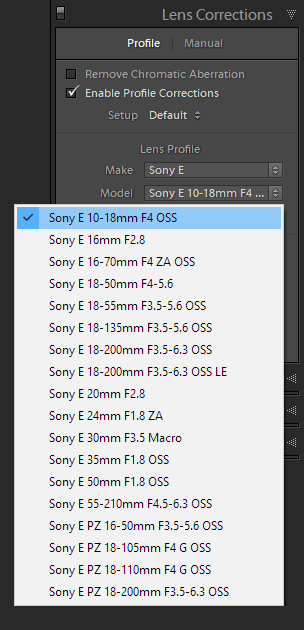
Within the Develop Module of Lightroom, open the Lens Correction Panel and examine the “Allow Profile Correction” field. This system robotically fixes the distortion.

Typically, Lightroom detects the proper mannequin of the lens and robotically applies the suitable correction primarily based on the lens profile. However, in some circumstances, it would detect the flawed lens mannequin, which suggests you’ll need to manually choose the make and mannequin of your lens from the drop-down menu.
I just lately began capturing with the Fujifilm XT2 and seen that it behaves otherwise in regard to Lens Correction. Fujifilm embeds the digicam’s lens profile contained in the RAW information and Lightroom robotically applies the correction throughout import.

On uncommon events when you find yourself utilizing an older lens or a mannequin from a lesser-known Asian producer, Lightroom could not have a lens profile in its database and could be unable to robotically appropriate the distortion. In these situations, it’s essential to leap to the Handbook tab and manually repair the distortion by dragging the distortion slider.

Tip: Once you shoot sure landscapes and portraits, you could not see sufficient straight traces within the composition to function a reference for lens distortion. In consequence, the distortions turn into much less evident and fewer noticeable. In these circumstances, it’s fully optionally available to repair them.
Step 2. Repair Uneven (Crooked) Horizon
An uneven horizon is panorama pictures’s largest enemy.
The horizon is without doubt one of the strongest factors of reference that’s imprinted in our brains from an early age. Once we see {a photograph} with a barely uneven horizon (one to 2 levels), our brains revolt and refuse to just accept the uneven actuality.
Associated: My High 15 Lightroom Workflow Ideas
I at all times take note of the horizon throughout the seize and attempt to make it as straight as attainable. However, in 90% of circumstances, the horizon in my images is barely off and requires just a few tweaks in post-processing.
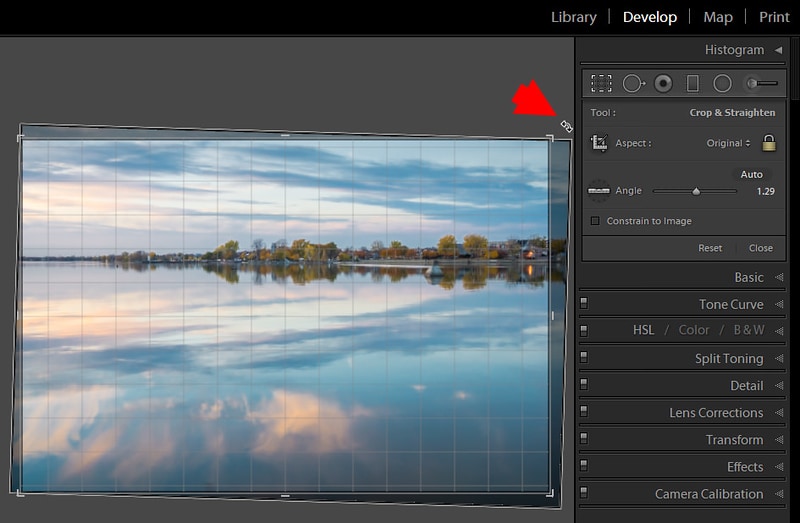
To repair an uneven horizon, open the Crop Overlay panel within the Develop Module of Lightroom. Right here, you have got a few choices.

Fixing Uneven Horizon With Auto Mode
I’m not a giant fan of “magic buttons” that promise to repair all the pieces robotically utilizing AI, machine studying, and magic. However, Auto Mode within the Crop Overlay panel is a uncommon exception.

When you have got an unobstructed horizon like these in seascapes, the Auto Mode button does a fairly good job. It solely takes one click on to straighten the horizon earlier than you might be prepared to maneuver on.

I used the AUTO choice to repair the uneven horizon.
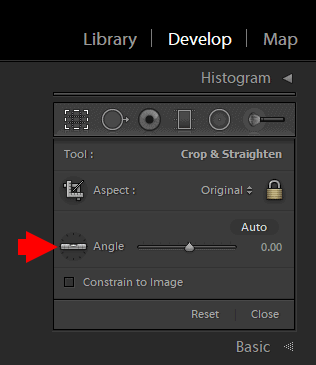
The best way to Manually Rotate Photograph in Lightroom
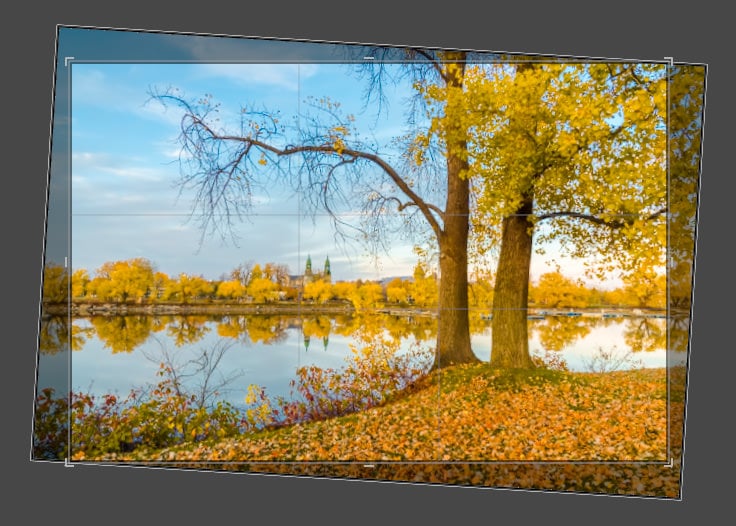
For guide photograph rotation, transfer the mouse outdoors the crop boundary till the Rotate Icon seems. Click on the icon and drag the mouse to provoke the rotation.
Once you press the mouse down, the grid contained in the crop boundary seems. Attempt to align the grid with the horizon within the image.
If you find yourself proud of the end result, hit the enter button to verify the modifications.
Adjusting the Horizon With the Straighten Device
That is my favourite software to repair crooked or uneven horizons.
Click on the Ruler Icon to provoke the Straighten Device.
Subsequent, click on and drag the mouse over the horizon in your photograph.
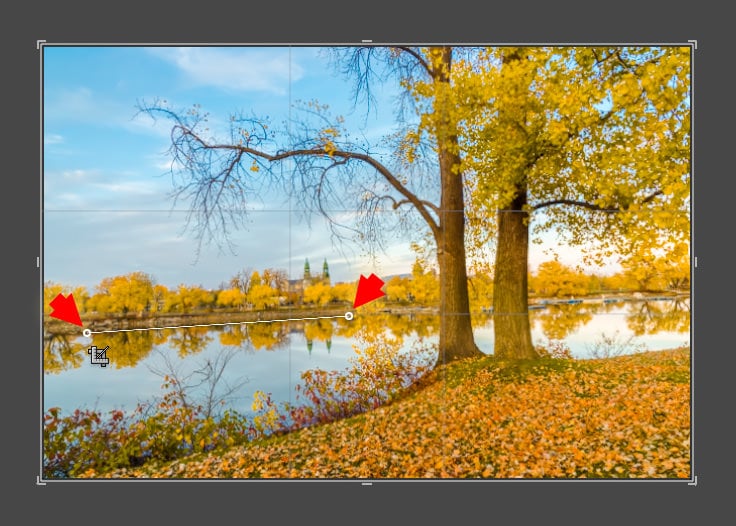
By doing this, you might be indicating to Lightroom the place the horizon is. Lightroom does the remainder of the work by straightening the {photograph}.
I discover this methodology to be essentially the most correct.
Tip: Everyone knows that guidelines are supposed to be damaged, and the straight horizon rule shouldn’t be an exception. So, if you happen to deliberately need to make the horizon crooked for creative functions, for instance, guarantee that it’s evident that it was achieved deliberately.

Step 3. Repair Perspective Distortion
Perspective Distortion happens when the aircraft of the digicam sensor shouldn’t be parallel to the item we photographed. Relying on the digicam place relative to the topic, the {photograph} can seem tilted or skewed.
Perspective Distortion is the obvious in architectural images the place compositions have an abundance of vertical traces.
Associated: Fuji xt3 vs xt30 Comparability
Once we {photograph} buildings from the road degree, the one solution to seize your complete construction is to tilt the digicam upward. This leads to an impact generally known as “converging verticals” the place completely parallel traces in actual life seem to converge within the {photograph}. This impact is also referred to as “leaning buildings” when the buildings seem to lean or fall backward.


Adobe acknowledges that perspective distortion is a standard situation in all varieties of pictures and has constructed an in depth toolset in Lightroom beneath the Rework Panel to handle the problem.
Fixing Perspective Distortion With the Upright Instruments
The Upright software has 5 choices: Auto, Guided, Degree, Vertical, and Full.
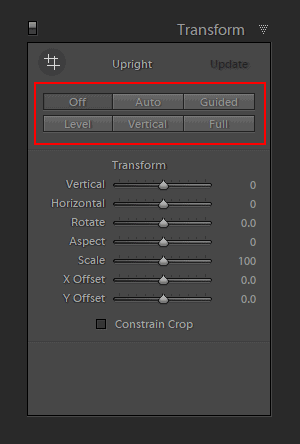
The automated choices (Auto, Degree, Vertical, and Full) are how Lightroom tries to repair the completely different points of perspective distortion by itself. I discover that every one 4 automated choices are too unpredictable with their hit-and-miss outcomes making them ineffective in my workflow.
The Guided choice is the one I like and most frequently use.
With the Guided software, you have got the choice to attract as much as 4 guides to point which traces within the photograph have to be parallel.
For instance, if I need to repair the vertical perspective, I draw solely two vertical traces.


However, if I would like to repair each the vertical and horizontal views, I draw 4 traces—two vertical and two horizontal—and let Lightroom do the remaining.

I drew 4 traces in complete – two vertical and two horizontal – and let Lightroom to repair the attitude.

Tip: You don’t at all times have to repair the vertical perspective. You are able to do the alternative by emphasizing and utilizing it because the ingredient of your composition.
Instance #1: I shot from the bottom of the forest and intentionally tilted the digicam up. The converging traces of the bushes produced the impact of being deeply submerged into the forest. I had no intention of fixing these converging verticals.

Instance #2: I used to be in downtown New York and I deliberately shot nearly straight as much as exaggerate the impact of the converging traces to focus on the texture of downtown and its monumental scale.

Fixing Perspective Distortion With the Rework Sliders
With seven remodel choices, you may individually modify varied points of the attitude distortion.

In my case, I take advantage of the Rework sliders together with the Crop Overlay and the Upright Guided instruments.
As soon as I straighten the horizon utilizing the Crop Overlay panel and repair the attitude utilizing the Upright Guided choice, I’d dive into the Rework part to fine-tune the correction.
For instance, whenever you repair a powerful vertical distortion, you noticeably change the facet ratio of the unique picture and make the objects of the composition a lot narrower. Right here within the Rework part, you may repair it by adjusting the Side slider.
To summarize:
The best way to Straighten a Photograph in Lightroom | Conclusion
It’s simple to straighten a photograph in Lightroom whenever you observe the steps I outlined on this article. With just a few clicks, you may repair crooked traces and make your photograph look its greatest.
Step 1: Use the Profile choice within the Lens Correction panel to repair the Lens Distortion.
Step 2: Use the Crop Overlay panel to straighten the uneven horizon.
Step 3: Use the Upright choices within the Rework panel to repair the vertical and horizontal views.

The entire course of shouldn’t take any longer than two minutes.
Articles Associated to “The best way to Straighten a Photograph in Lightroom – 3 Step Strategy“
[ad_2]