

[ad_1]
Taylor Hutchinson 10.09.23
Whether or not tenting, looking, or fishing; managing rope, line, and cordage is crucial when venturing open air. Studying just a few knots beforehand is a precious ability set to have within the toolbox. The flexibility it affords dietary supplements the dearth of extra sources that aren’t at all times out there. Campsites aren’t at all times completely arrange for the tent that’s chosen. Gear breaks or wears out on the worst moments. Carrying gear doesn’t must be restricted to what matches inside a backpack. Necessity is the mom of invention, and nature doesn’t at all times enable us to choose the time or state of affairs through which the necessity arises. The six P’s of planning are our information to buying important expertise earlier than requiring them. Prior correct planning prevents poor efficiency. These are just a few important knots that may be tailored for any state of affairs.
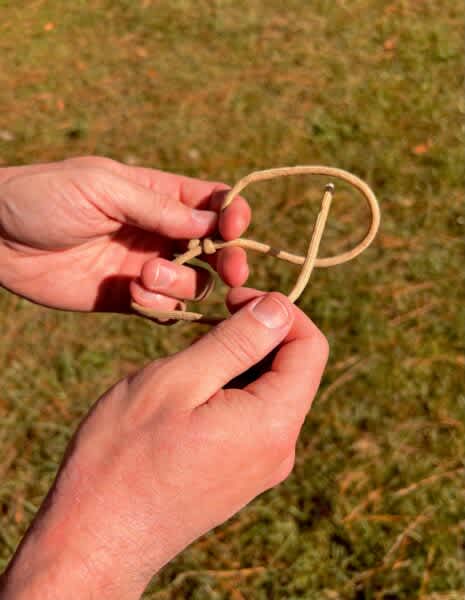
Canadian Jam Knot
The primary knot is probably the most versatile on this sequence. The Canadian Jam Knot derives its title from the 2 knots that jam collectively, forming a good wrap round an object. That is greatest for wrapping firewood collectively, binding a cross brace for a construction, or binding objects collectively for repairs. Not like a constrictor knot, the jam knot may be loosened with out untying the knot . Tying the knot is pretty fundamental. First, begin by wrapping the thing or objects to be certain collectively. Tie a normal overhand knot just a few inches beneath the primary tag finish. Don’t tighten this overhand knot. Subsequent, close to the tip of that very same tagline, tie one other overhand knot. This second overhand may be cinched down. Now take the 2nd tag finish of the cordage and feed that via the outlet made by the primary overhand knot. Pull pressure and the knots will come collectively. The trick to unbind this knot is to drag the knot in the other way through which it was tightened.
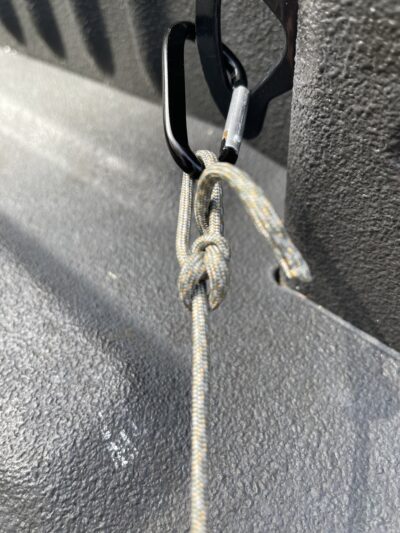
The Bowline
This subsequent knot is probably the most trusted and essential knot one can study. The Bowline knot strengthens when it’s beneath load. This knot is for when one must make a loop on the finish of their line. It’s so safe that it is suggested by the FAA to tie down small plane. Numerous makes use of for the knot open air are useful for climbers, campers, sailors, and lots of others. The knot appears complicated to tie when trying on the completed product. Nevertheless, many search and rescue professionals can tie it with one hand. Beginning the knot is easy, think about again within the day once we used keys to activate our vehicles. Now flip the automobile off and use that very same movement to create a loop in the principle line. Take the free tag finish and go beneath and out of the loop. Take the tag finish and go it round the principle line after which again down the loop. You should definitely maintain the tag finish and pull the principle line to tighten down. If that is finished accurately, one can observe a “U” form within the knot. When not beneath load, this knot may be shaken free. Studying this knot, one can belief that their hammock, boat, or bear bag isn’t going anyplace.
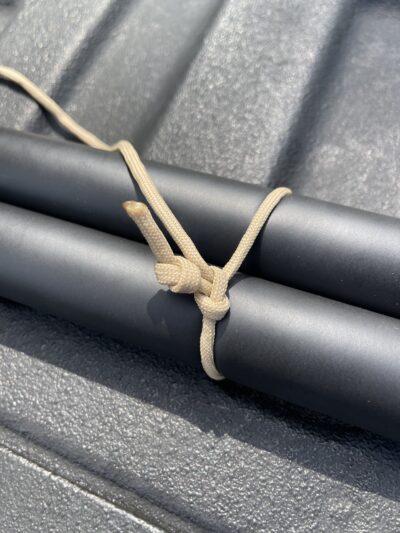
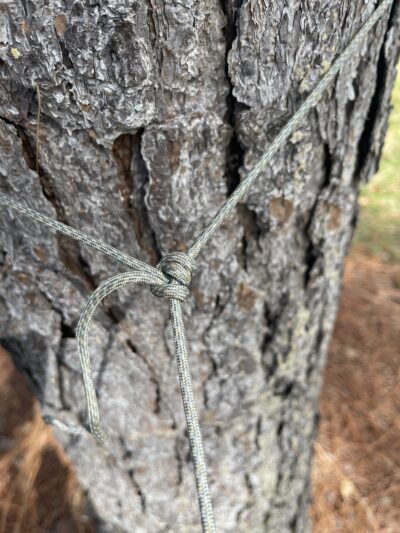
Taut Line Hitch knot
The ultimate knot in our sequence is adjustable and greatest used for traces that want variable pressure. This pressure is maintained by sliding the hitch up and down the principle line to loosen or tighten the loop measurement. By this adjustment of the loop measurement, one can shorten or lengthen the principle line. Named the Taut Line Hitch knot, it’s best used for securing traces when pitching tents or creating adjustable moorings when tying off a ship throughout altering tides. The extra widespread use for the day-after-day is securing objects and cargo on automobiles when ratchet straps aren’t out there or are overkill. Begin by wrapping the principle line across the load-bearing object, hook, or tree. Take the tag finish and, from the underside, wrap it round the principle line twice. From right here take the tip of the tag finish and go it beneath the road, making the primary wrap. Proceed beneath after which over the mainline. Go the tag down via the loop that was simply created in entrance of the road wrapping across the object. Alter by pulling the loop finish in the direction of or away from the knot.
Training these with some 550 twine or nylon rope makes them simple to memorize and recall when wanted. Take into consideration conserving some spare 550 twine round to observe whereas watching TV or simply to go the time is an effective option to ingrain these expertise into the synapses of the mind. Figuring out which knot to make use of just isn’t restricted to what was coated right here. Expertise offers over to knowledge, and knowledge is available in time. Get exterior to search out what knowledge it has to supply.


[ad_2]