

[ad_1]
If you wish to know methods to easy pores and skin in Lightroom, you’ve come to the suitable place. As a result of at this time I need to share my 3-step strategy to modifying portraits, together with pores and skin smoothing and softening.
You most likely seen the images you are taking of your loved ones members are very totally different from those you see within the magazines. There are lots of o causes for that. The obvious ones are the proper lighting and make-up. However essentially the most important influence on producing the professional-looking captures is retouching.
Sometimes, the retouching a part of skilled portrait and style workflow is lengthy and tedious. The skilled retouchers can spend hours engaged on a single {photograph}. It’s common that photographing and retouching are carried out by totally different folks.
However since I don’t take portraits professionally and my fashions are largely members of the family, I can’t afford to spend hours engaged on a single photograph. As a substitute, I developed a simplified portrait modifying course of the place the central half is to wash up my mannequin’s pores and skin and make it easy and smooth.
Clean Pores and skin in Lightroom
Irrespective of if I must retouch environmental or indoor portraits, I at all times comply with the identical easy workflow.
Right here is the three-step course of on methods to easy pores and skin in Lightroom: first, you take away the seen pores and skin imperfections; second, you scale back wrinkles, primarily beneath the eyes and on the brow; third, you easy and soften pores and skin the place it’s alleged to be easy.
It may all be performed in Lightroom in a matter of minutes.
Demonstration Photograph
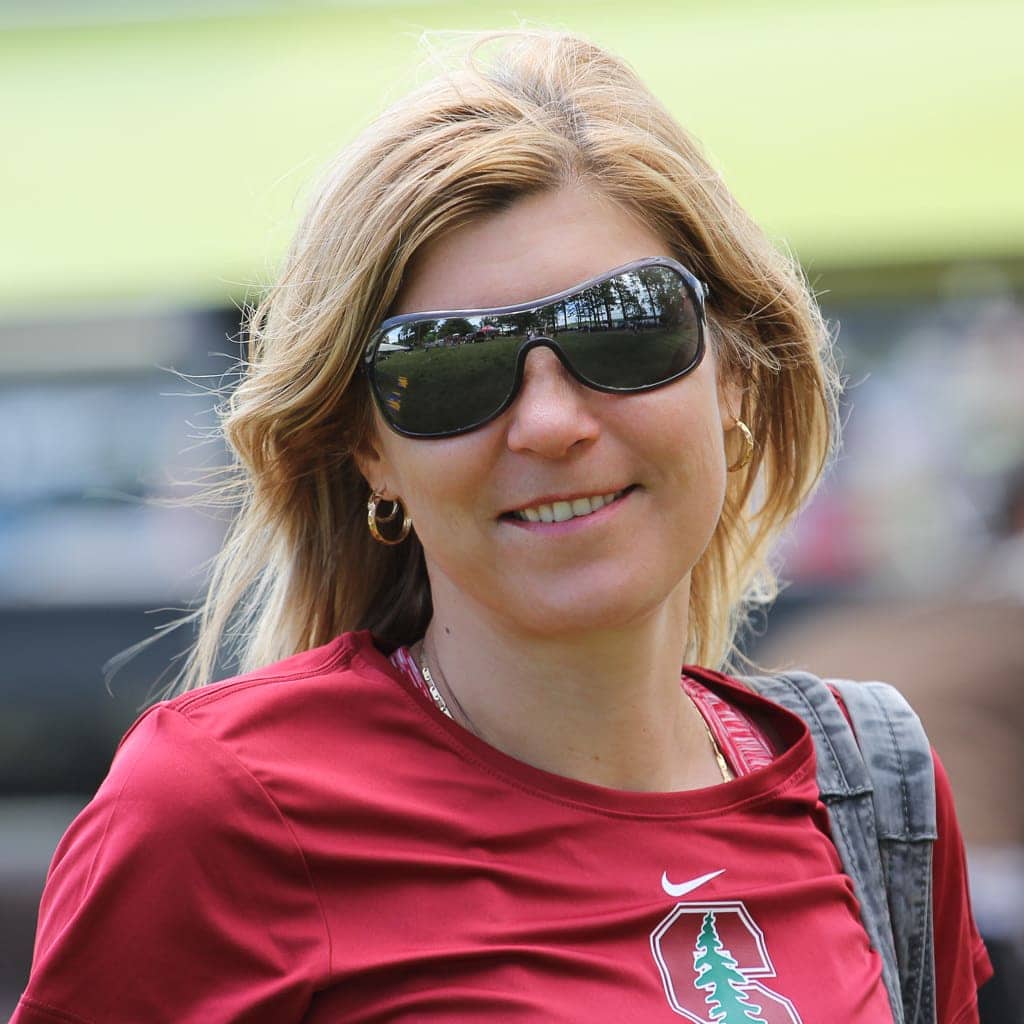
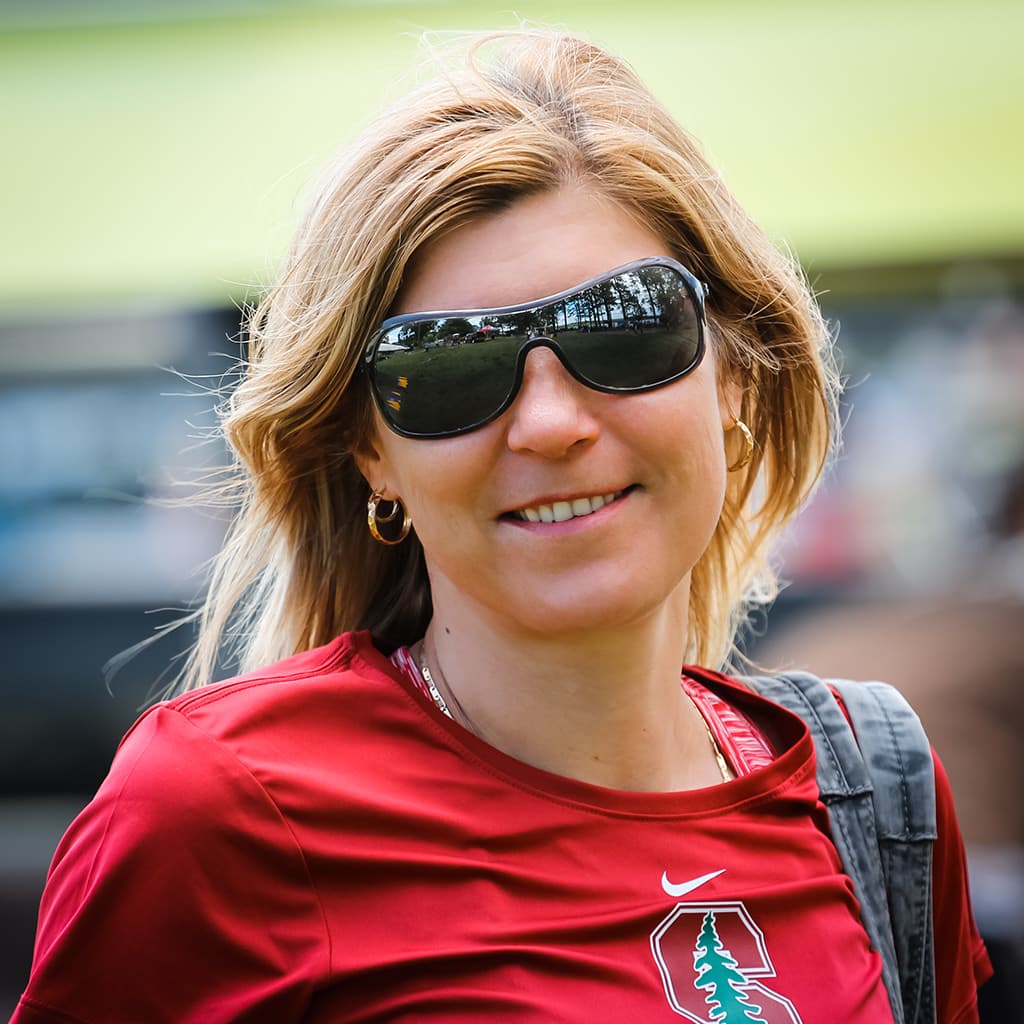
For at this time’s demonstration, I used a photograph of my member of the family. The photograph by no means meant to be greater than a easy trip photograph.
I took the photograph round midday with the California solar blasting from the zenith. The cruel solar amplified the pores and skin imperfections, and I knew effectively prematurely that I must tackle it.

And right here is the ultimate outcome after I utilized my 3-step retouching workflow.
Let’s see the way it was performed.
Step One: Eradicating Pores and skin Imperfections
The pores and skin imperfections could be in several kinds. The most typical are blemishes and pimples attributable to zits.
The overall rule of portrait retouching is to not take away pure and everlasting options akin to birthmarks and scars. However since pimples and blemishes are non permanent anomalies, we are able to take away them unapologetically.
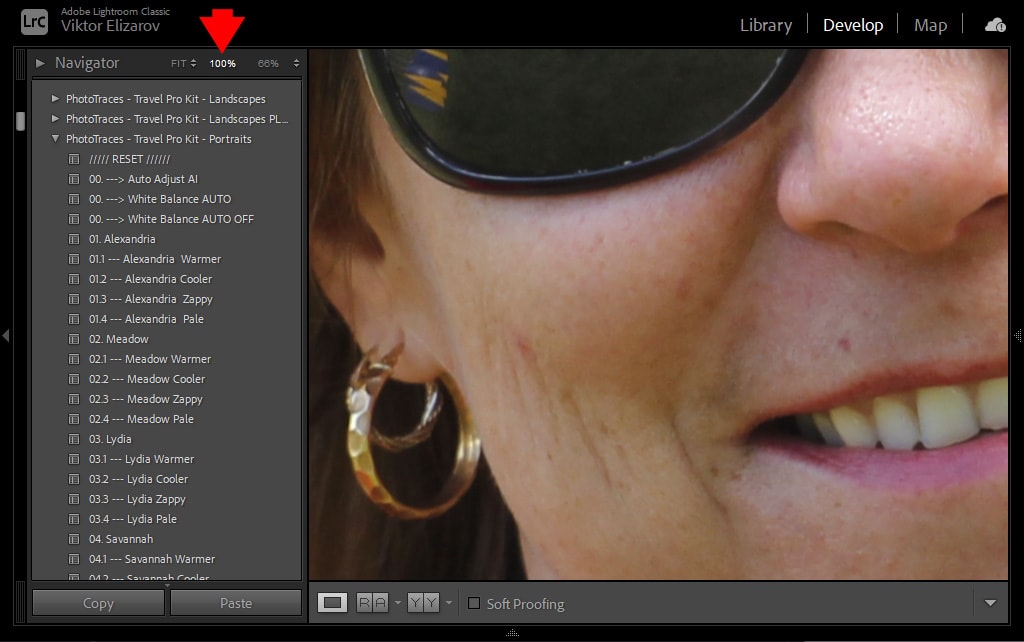
1. Zoom to 100%
When modifying landscapes, you typically need to see all the picture and infrequently zoom in on a selected space. In portrait retouching, it’s totally different. To be sure you can establish even small imperfections, it’s important to work at excessive magnification ranges.
I discover that even 50% of magnification isn’t sufficient for analysis and modifying.
100% magnification works one of the best.
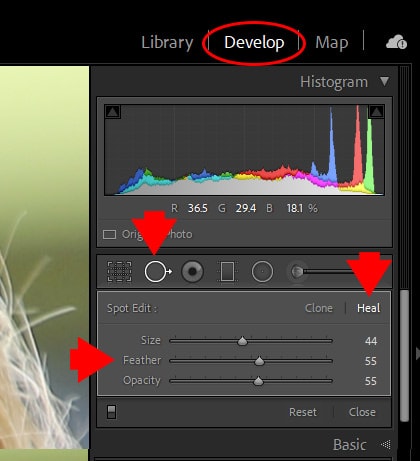
2. Set Up the Spot Elimination Instrument
Choose the Spot Elimination Instrument.
For the modifying mode, choose the HEAL possibility.
The Heal mode works one of the best for retouching as a result of, by design, it matches the feel, lighting, and shading of the sampled space to the chosen area. And the CLONE possibility makes use of a pattern space data with out changes for lighting and texture.
Maintain Feather possibility at 55% and Opacity at 100%.

3. Take away Pores and skin Imperfections in Heal Mode
Now, for a sooner and extra environment friendly workflow, you should know just a few keyboard shortcuts.
Brush Measurement Shortcut
Use “]” and “[“ keyboard shortcuts to increase or reduce the size of the Spot Removal Brush. Potentially you can adjust the brush size fast for every skin imperfection you want to remove.
Hide Brush Outline Shortcut
Use the shortcut “H” to hide the brush outline for an undistracted view. By hitting “H” again makes the Spot Removal outline visible again.
Sampling Area Shortcut
When you click on the skin defect you want to remove with the Spot Removal Brush, the program automatically selects the sampling area and uses its information to mask the defect. In 90% of cases, Lightroom gets it right, but in some cases, you need to tell Lightroom that the sampling area it selected is wrong. Use the shortcut “/” to force the program to choose another sampling area. You can do multiple times.
On rare occasions, when Lightroom still can not find the right sampling area, you can manually move the selection by clicking on it and repositioning it to the correct location. But it rarely happens to me.
And now, you start stamping the skin imperfections and on the fly adjusting brush size by using the shortcuts.
It is fast, simple, and fun.

Step Two: Removing Wrinkles
The wrinkles are natural and permanent features, and we need to deal with them differently.
The wrinkles are an acceptable feature of portraits; it keeps our photography more real.
But in some cases, especially when shooting environmental portraits, the harsh light from above can amplify the wrinkles, making the person look older with more uneven and ragged skin. In such cases, we need to reduce wrinkles prominence.
1. Select Spot Removal Tool
To reduce wrinkles, you are going to use the Spot Removal Tool again, but with different settings.
Use HEAL mode and set Opacity to 55% and Feather to 55%
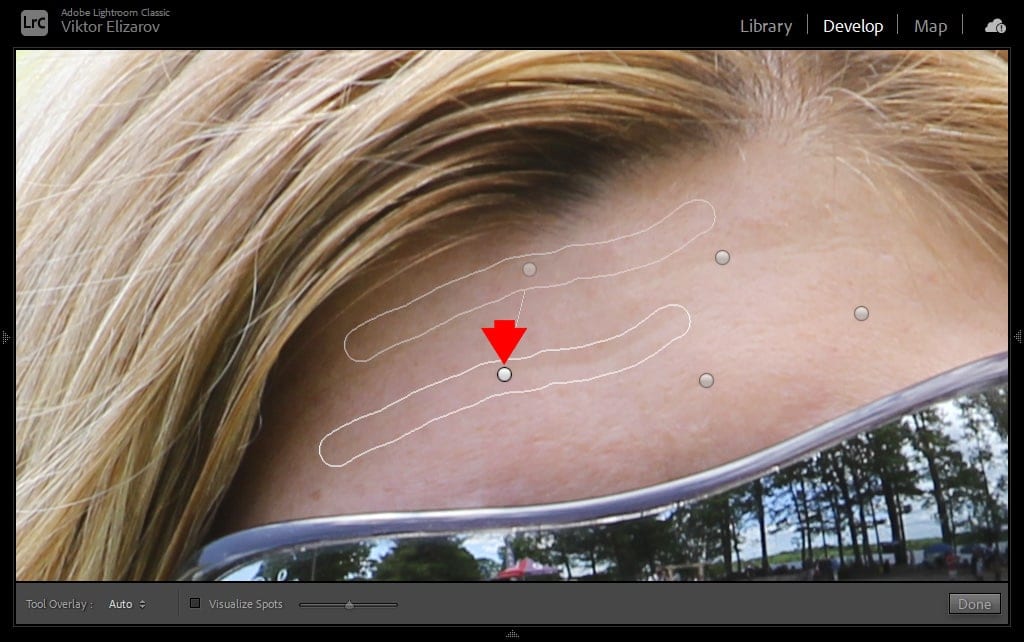
2. Remove Wrinkles With the Longer Strokes
Once again, you are going to use the shortcuts I listed above:
- “]” and “[“ to change the size of the Spot Removal Brush
- “H” to hide and unhide the Spot Removal outlines
- “/” shortcut to force Lightroom to change sampling area.
The main difference between removing imperfections and wrinkles is that the area of the face you will affect is much larger.
Instead of stamping, you will use longer strokes to cover a single wrinkle in one go. As a result, Lightroom’s sampling area needs to be much bigger. Since it is a more complex task than single stamping, Lightroom fails more often by choosing the wrong area from where it acquires healing info. It means you will have to interfere more often.
You can still use the “/” shortcut to force Lightroom to resample, but I find that the most effective way to use the right source for healing is to reposition the sampling area manually. Click on the sampled area outline and drag it to the correct location.
Extra Tip. Let’s say you stroke over the wrinkle with the Spot Removal brush, and you feel that result is not what you expected. Don’t worry; you can adjust it after the fact.
If you removed too much texture or the wrinkle still looks too prominent, you can boost or reduce the healing effect by changing the Opacity value. Make sure to hit the “H” shortcut to perform fine-tuning without any obstructions.
Step Three: Smooth The Skin with Adjustment Brush
Finally, you are ready to apply the most effective feature of portrait retouching, soften, and smoothing of the skin. It is important to do it in the last step; otherwise, you will end up with smudges caused by blurred wrinkles and blemishes.
1. Zoom to 50%
Now you need to zoom out by one step to make sure you can assess the larger area of the face for smoothing effect.
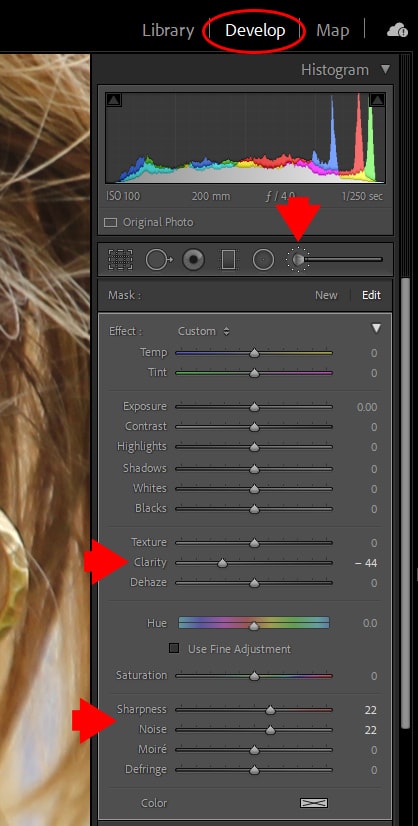
2. Select The Adjustment Brush Tool
Select the Adjustment Brush tool and use the following setting:
You do not have to worry about using the wrong settings; after you finished brushing, you can alter every parameter.
3. Apply the Soften Skin Effect
Now you can start brushing over the area of the skin that requires smoothing and softening.
Once again, use the “]” and “[“ shortcuts to change the brush size.
Use the “O” shortcut to visualize the area affected by the smoothing effect.
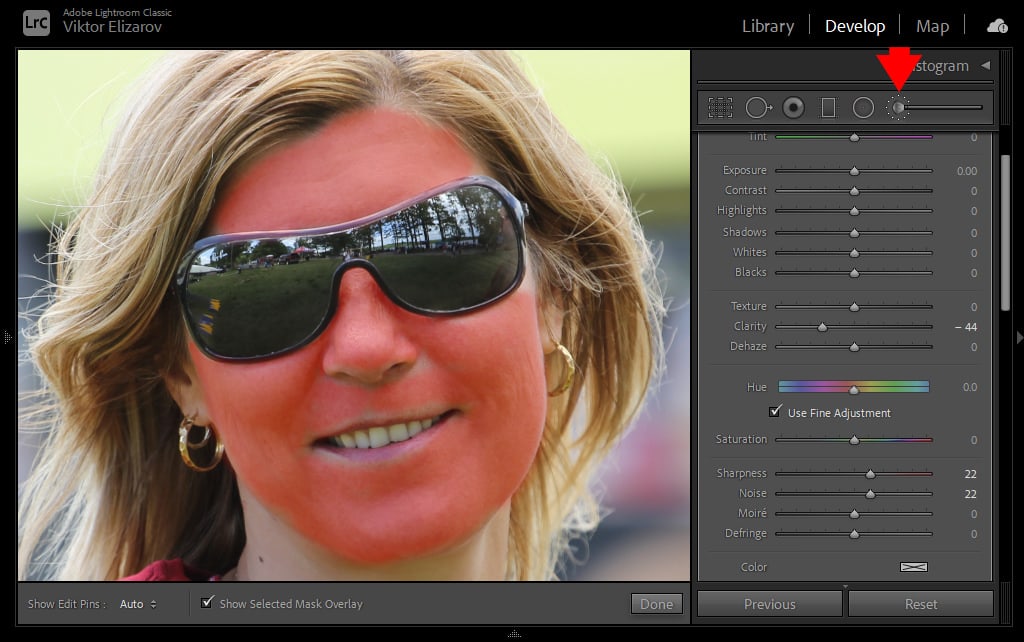
Make sure you do not brush over the areas that have to stay sharp, such as hair, lips, nostrils, eyebrows.
If you brush over the area that is not supposed to be soften, do not worry. Hit the “ALT” / “OPT” key to change the Brush tool to an Eraser. Erase the unwanted effect by brushing over it, and when you finished, release the “ALT” / “OPT” key.
When you are done, hit the “O” shortcut key one more time to visualize the affected area.
4. Fine Tune the Soften/Smooth Effect
If you are unhappy with the level of softening or smoothing, you can modify it at the end.
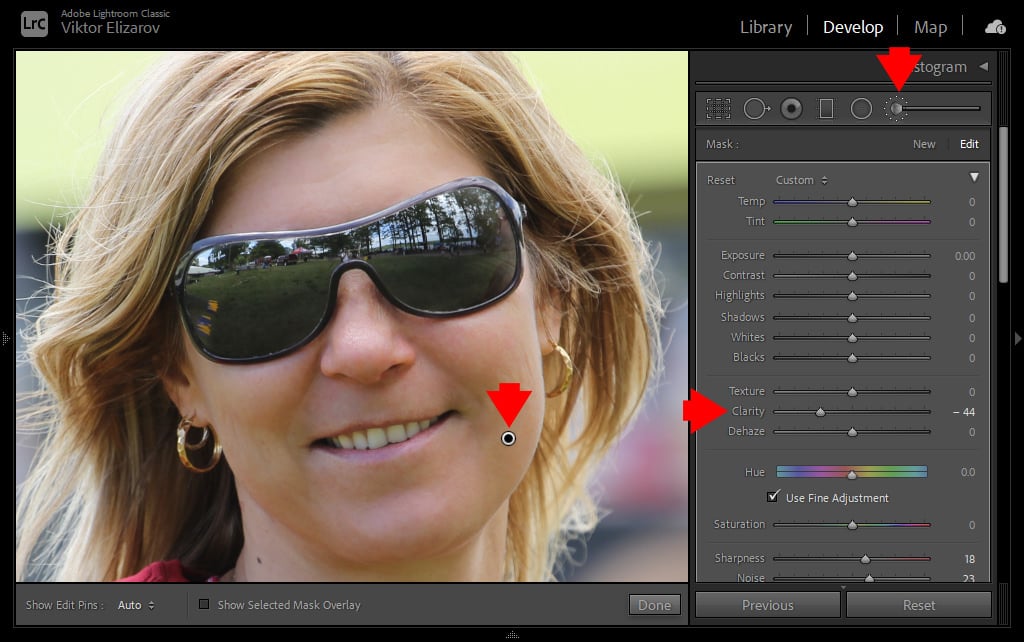
Make sure you select the Adjustment Brush Pin by clicking on it. Turn off the color overlay preview if it is still on by using the shortcut “O.”
Now you can dial up or dial down the smoothing effect by moving the Clarity slider to the left or right.
And that is it.
Optional Step: Lightroom Rapid Editing
And when I am done with skin smoothing, I move to Lightroom Rapid Editing, where I use my standard preset based workflow.
Related: How to Copy and Paste Edits in Lightroom
I applied the Meadow preset from my Travel Pro Kit collection first, and in the end, I use the TOOLKIT Adjustment presets to fine-tune the image.
Before & After Transformation
How to Smooth Skin in Lightroom: Final Thoughts
I hope my simple walkthrough will help you to take portrait editing under control. This simple 3 step approach is most effective with environmental portraits taken outdoors where we can not control the lighting.
Articles Related to “How to Smooth Skin in Lightroom (Fix Blemishes, Pimples & Wrinkles)“
[ad_2]